# Meteo app
In this application, you will design an app that shows the weather forecast for the next few days based on the GPS coordinates (latitude and longitude). You are going to retrieve the weather forecast through the OpenWeatherMap API. The exact city name will be retrieved through OpenStreetMap
- Create a new project:
$ cordova create meteo be.yourName.meteo Meteo
$ cd meteo
$ cordova platform add browser android
2
3
- Install the plugin that allows you to retrieve the GPS coordinates.
$ cordova plugin add cordova-plugin-geolocation
- Create a free account on https://home.openweathermap.org/users/sign_up
Allows you to make up to 1,000,000 applications per month. See info.
# Content of the website.
- Delete the entire contents of the www folder and replace it with the files from this zip file.
- Examine the files.
# index.html
<!DOCTYPE html>
<html lang="nl">
<head>
<meta charset="UTF-8">
<meta name="viewport" content="user-scalable=no, initial-scale=1, maximum-scale=1, minimum-scale=1, width=device-width">
<link rel="stylesheet" href="https://fonts.googleapis.com/icon?family=Material+Icons">
<link rel="stylesheet" href="https://cdnjs.cloudflare.com/ajax/libs/materialize/1.0.0/css/materialize.min.css"/>
<link rel="stylesheet" href="https://cdnjs.cloudflare.com/ajax/libs/weather-icons/2.0.9/css/weather-icons.css">
<title>Meteo</title>
<style>
#weather {
display: none;
}
.card-content h5 {
padding-top: 0;
margin-top: 0;
}
.card-image {
padding: 10px;
text-align: center;
}
.card-image h4 {
margin: 0;
}
.card-image span:first-child {
color: dodgerblue;
margin-right: 5px;
}
.card-image span:last-child {
color: red;
margin-left: 5px;
}
</style>
</head>
<body>
<!-- Fixed navbar: https://materializecss.com/navbar.html -->
<div class="navbar-fixed">
<nav class="teal ">
<div class="nav-wrapper container">
<a href="#!" class="brand-logo center">Meteo</a>
</div>
</nav>
</div>
<!-- Fixed floating action button: https://materializecss.com/floating-action-button.html -->
<div class="fixed-action-btn">
<a class="btn-floating btn-large waves-effect waves-light blue-grey" id="renew"><i
class="material-icons">autorenew</i></a>
</div>
<!-- Grid: https://materializecss.com/grid.html -->
<div class="container">
<div class="row">
<h4 class="center-align" id="city"> </h4>
<!-- Progress indicator (preloader): https://materializecss.com/preloader.html -->
<div class="progress">
<div class="indeterminate"></div>
</div>
<div class="col s12" id="weather">
</div>
</div>
</div>
<script src="https://cdnjs.cloudflare.com/ajax/libs/jquery/3.5.1/jquery.min.js"></script>
<script src="https://cdnjs.cloudflare.com/ajax/libs/materialize/1.0.0/js/materialize.min.js"></script>
<script src="cordova.js"></script>
<script src="js/weather.js"></script>
<script defer src="js/app.js"></script>
</body>
</html>
2
3
4
5
6
7
8
9
10
11
12
13
14
15
16
17
18
19
20
21
22
23
24
25
26
27
28
29
30
31
32
33
34
35
36
37
38
39
40
41
42
43
44
45
46
47
48
49
50
51
52
53
54
55
56
57
58
59
60
61
62
63
64
65
66
67
68
69
70
71
72
73
74
- At the top of the page is a fixed navbar.
- The fixed action button
a#renewserves to refresh the page. - In
h4#citythe name of the city will appear (orWeather.loadingMsgwhile (re)loading). - Under this title another preloader
div.progressappears.
This is only visible during (re)loading the data from the APi's. - As soon as the data has been read completely,
div.progressbecomes invisible anddiv#weathervisible.
# js/app.js
This page is completely finished. You don't need to change anything in this code.
$(function(){
    document.addEventListener("deviceready", onDeviceReady, false);
});

function onDeviceReady() {
    console.log('Device is ready');

    $('#renew')
        .click(function () {
            $('#city').text(Weather.loadingMsg);
            Weather.init();
        })
        .click();   // trigger click event on a#renew
}
2
3
4
5
6
7
8
9
10
11
12
13
14
# js/weather.js
In the initialization phase, the preloader h4#city is displayed.
The (old) content of div#weather is erased and set invisible.
Why delete the content? The link a#renew also calls this function.
So you have to delete the old content first before you can add new data.
const Weather = function () {
    const openweatherKey = 'MySecretKey';
    const openweatherUrl = 'https://api.openweathermap.org/data/2.5/onecall';
    const openstreetUrl = 'https://nominatim.openstreetmap.org/reverse';
    const loadingMsg = 'Loading forecast...';
    const myLocation = {    // default location: Thomas More Campus Geel
        lat: 51.160946,
        lon: 4.959205
    }

    const init = function () {
        $('.progress').show();
        $('#weather').empty().hide();
    };

	const _geolocationSuccess = function (position) {

    };

    const _geolocationError = function (error) {

	};

    const _getWeather = function () {

    };

    const _getCity = function () {

    };

    return {
        loadingMsg: loadingMsg,     // public property
        init: init                  // public methode
    };
}();
2
3
4
5
6
7
8
9
10
11
12
13
14
15
16
17
18
19
20
21
22
23
24
25
26
27
28
29
30
31
32
33
34
35
36
- Line 2
Replace MySecretKey with the API key associated with your account. - Line 5
The message during (re)loading the data from the APi's. - Line 6 to 9:
This object literal contains the coordinates of Thomas More Campus Geel and is used if the device does not have a GPS. - Open the application in the browser.
$ phonegap serve
- Open the app in Chrome http://localhost:3000 (NOT on http://ip-adres:3000).
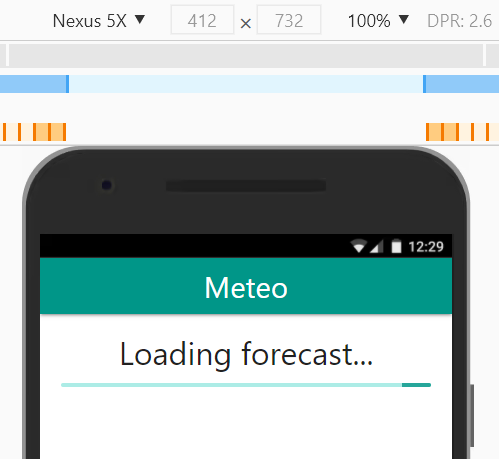
Only the title and the preloader are visible for now.
# Read or simulate GPS coordinates.
- Modify the code on js/weather.js:
const init = function () {
    $('.progress').show();
    $('#weather').empty().hide();
    navigator.geolocation.getCurrentPosition(_geolocationSuccess, _geolocationError, {
        timeout: 5000,
        enableHighAccuracy: true
    });
};

const _geolocationSuccess = function (position) {
    console.log(position);
    myLocation.lat = position.coords.latitude;
    myLocation.lon = position.coords.longitude;
    console.log(`latitude: ${myLocation.lat} \nlongitude: ${myLocation.lon}`);
    _getWeather();
    _getCity();
};

const _geolocationError = function (error) {
    console.log(error);
    alert(`code: ${error.code}
		message: ${error.message}
		Please turn on your GPS`);
    _getWeather();
    _getCity();
};
2
3
4
5
6
7
8
9
10
11
12
13
14
15
16
17
18
19
20
21
22
23
24
25
26
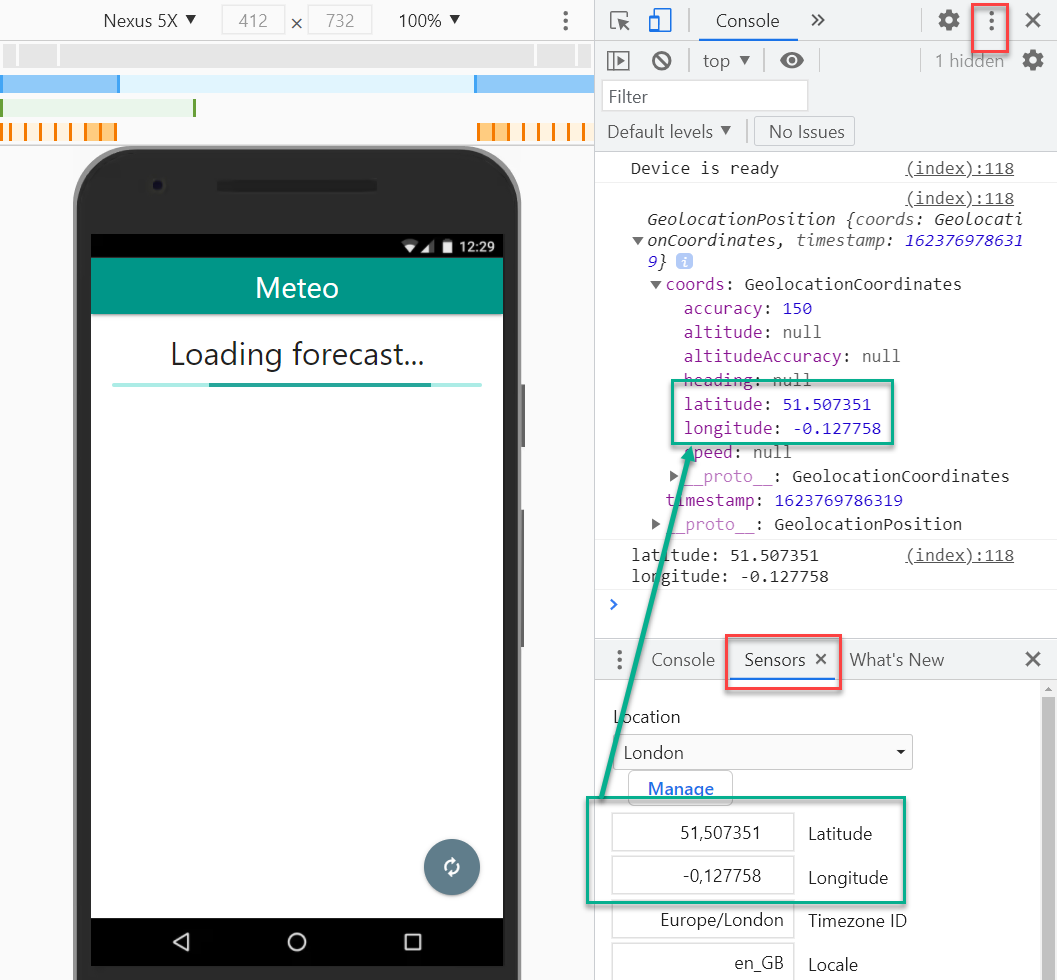
- In the console, the full
positionobject appears (line 11) and then thelatitudeandlongitude(line 14). - You can also simulate other locations from within the DevTools. Click on the three dots at the top right. From the menu, choose More tools -> Sensors.
- In the screenshot below you can see the location for London.
 Now that the correct location is known, we can pass the object properties
 myLocation.latandmyLocation.lonto the functions_getWeather()and to_getCity(). The first function retrieves the weather forecast, and the second function retrieves the city or town.
# Retrieve Weather Forecast
We can retrieve the weather forecast for London from the URL below:
https://api.openweathermap.org/data/2.5/onecall?lat=51.507351&lon=-0.127758&lang=nl&units=metric&exclude=minutely%2Chourly&appid=[key]
- Replace in the URL:
[key]with your personal key.lang=nltolang=enfor English
TIP
Add the Chrome extension JSON Formatter so you can see the result in a nice, structured way.
The keys/values of interest are:
timezone: the time zone (Europe/London)daily: an array of eight objects containing, among other things, the icon (weather[0].icon), the icon id (weather[0].id) the Dutch description (weather[0].description), the day (dt) and the minimum/maximum temperature (temp.minandtemp.max).- Translated to our application this gives the following code:
let _getWeather = function (lat, lon) {
// Create a object literal with all the query parameters
const pars = {
lat: myLocation.lat,
lon: myLocation.lon,
lang: 'nl', // or en
units: 'metric',
exclude: 'minutely,hourly',
appid: openweatherKey
}
// Display the URL with query parameters in console
console.log('API call:', `${openweatherUrl}?${$.param(pars)}`);
// $.getJSON(url, [queryParameters], [successCallback]).done().fail().always()
$.getJSON(openweatherUrl, pars, function (data) {
console.log('weather', data);
console.log('description', data.current.weather[0].description);
try {
const forecast = data.daily;
$.each(forecast, function (index) {
const description = this.weather[0].description;
const icon = this.weather[0].icon;
const iconId = this.weather[0].id;
const day = new Date(this.dt * 1000).getDay();
const dayArray = ['Zondag', 'Maandag', 'Dinsdag', 'Woensdag', 'Donderdag', 'Vrijdag', 'Zaterdag'];
// const dayArray = ['Sunday', 'Monday', 'Tuesday', 'Wednesday', 'Thursday', 'Friday', 'Saturday'];
const min = Math.round(this.temp.min);
const max = Math.round(this.temp.max);
$('#weather').append(
`<div class="card horizontal">
<div class="card-image">
<img src="https://openweathermap.org/img/w/${icon}.png" alt="">
<p><span>${min}°</span>-<span>${max}°</span></p>
</div>
<div class="card-stacked">
<div class="card-content">
<h5>${dayArray[day]}</h5>
<p>${description}</p>
</div>
</div>
</div>`
);
}
);
} catch (err) {
console.error(err.message);
$('#city').text(err.message);
}
}).done(function () {
// successCallback is over: show the weather forecast
$('#weather').show();
}).fail(function (jqxhr, textStatus, error) {
// Something went wrong: successCallback and done() were not executed
console.error(error);
$('#city').text(error);
}).always(function () {
// After successCallback, done() or fail(): hide preloader
$('.progress').hide();
})
};
2
3
4
5
6
7
8
9
10
11
12
13
14
15
16
17
18
19
20
21
22
23
24
25
26
27
28
29
30
31
32
33
34
35
36
37
38
39
40
41
42
43
44
45
46
47
48
49
50
51
52
53
54
55
56
57
58
59
60
61
Showing the day and icon may require some additional explanation.
- Line 25
From the API, we only get back an Unix timestamp. This is the number of seconds elapsed since January 1, 1970. JavaScript does not work with seconds, but with milliseconds. Hence, we first multiply this number by 1000 in order to retrieve the correct date (new Date(this.time * 1000))
We are not really interested in the full date, but only in the weekday (new Date(...).getDay()). This returns a number between0(Sunday) and6(Saturday). - Line 26, 27 and 38
You use the array of line 26 (or line 27 for English) on line 38 to translate the day number into a day name. - Line 33
According to the documentation, there are 18 icons available. 9 for day view (xxd) and 9 for night view (xxn).
However, some "hidden" variants are also available. For example the rain icon:- http://openweathermap.org/img/wn/10d@2x.png (default)
- http://openweathermap.org/img/wn/10d.png (small)
- http://openweathermap.org/img/wn/10d@4x.png (extra large)
- http://openweathermap.org/img/w/10d.png (3D)
We choose the 3D variant in this example.
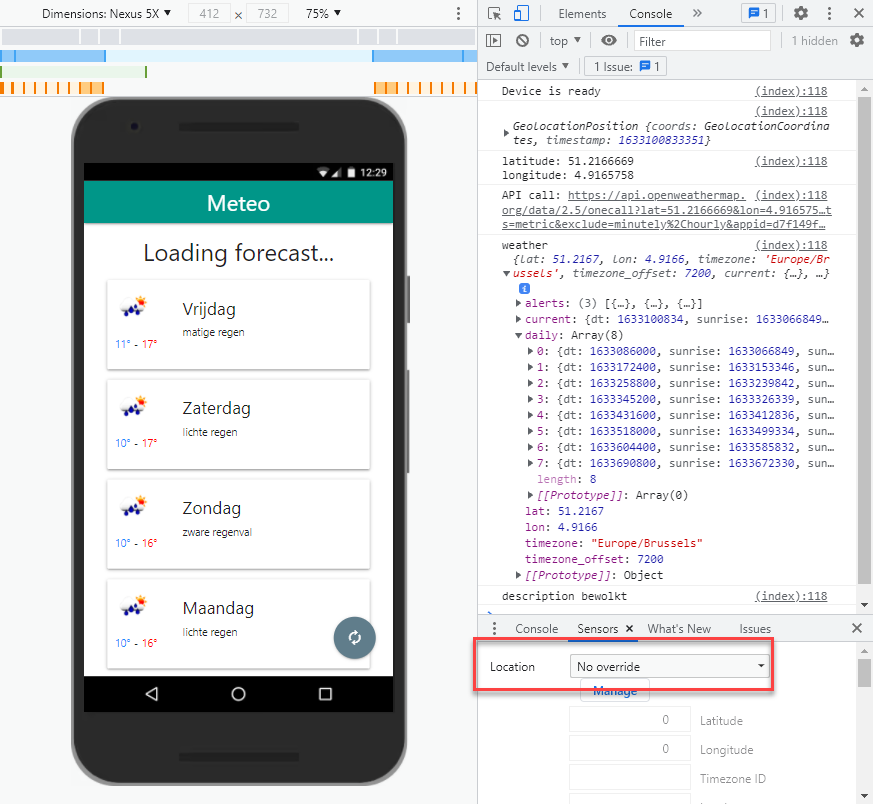
Here is the weather forecast for my current location:
# Alternative icons
If you are not satisfied with the OpenWeatherMap icons, you can choose to use one of the numerous freeware weather icons. Often you will have to make your own translation table to convert the code of OpenWeatherMap to the correct image.
For example: replace 10d with rain.png.
If you use the Weather Icons from Erik Flowers, you do not have to write your own translation table. This is already built in https://erikflowers.github.io/weather-icons/api-list.html.
Instead of weather[0].icon you now use weather[0].id.
You also don't need to download the CSS file. It is already linked via a CDN at line 8 of the index page.
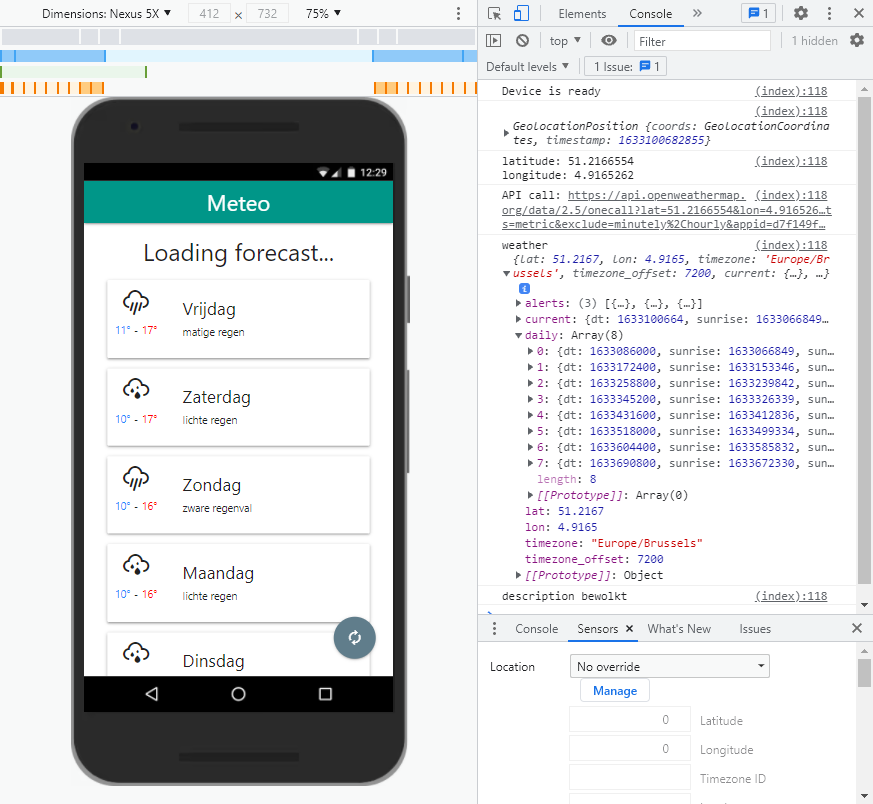
Replace the image in the card with the matching SVG Weather icon:
- Replace:
<img src="http://openweathermap.org/img/w/${icon}.png" alt=""> - With:
<h4 class="wi wi-owm-${iconId}"></h4>
# Retrieve City or Town
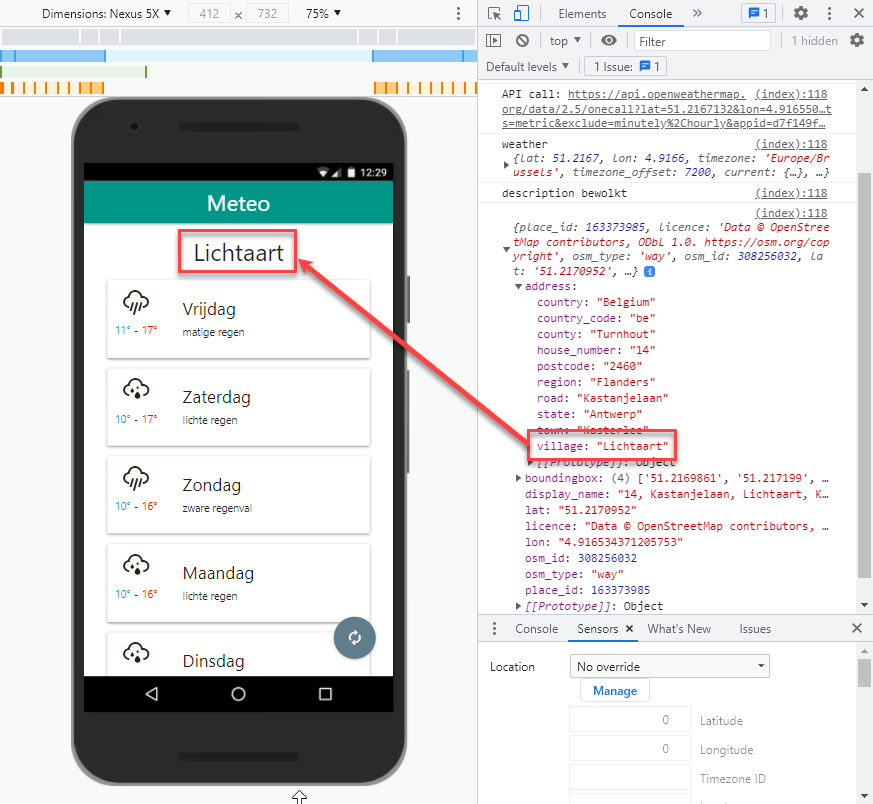
Open Street Maps has an APi that allows you to retrieve the correct address from the latitude and longitude. This is called reverse geocode. You can use this API freely without a key.
The information you get back is not really uniform. Take a look at the following locations:
- Thomas More Geel: is located in a municipality (
address.municipality: Geel).
http://nominatim.openstreetmap.org/reverse?format=json&lat=51.160946&lon=4.959205 - Berlin (from the simulator): is a city (
address.city: Berlin)
http://nominatim.openstreetmap.org/reverse?format=json&lat=52.520007&lon=13.404954 - Bobbejaanland: is located in a village (
address.village: Lichtaart)
http://nominatim.openstreetmap.org/reverse?format=json&lat=51.20164&lon=4.9025 - ...
Depending on the location, you need to check different fields. Hence, in the code, we request all possibilities through a OR comparison (line 9).
- Add the code below to js/weater.js:
const _getCity = function () {
    const pars = {
        format: 'json',
        lat: myLocation.lat,
        lon: myLocation.lon
    };
    $.getJSON(openstreetUrl, pars, function (data) {
        console.log(data);
        const location = data.address.municipality || data.address.village || data.address.city_district || data.address.city || data.address.town || data.address.state;
        $('#city').html(location);
    });
};
2
3
4
5
6
7
8
9
10
11
12
Below the weather forecast for my location:
# Install the meteo app
- Put all unnecessary logs (
console.log(...)) in comments. - Create an icon for the app and place it in the resources folder.
$ cordova-res android --type icon1 - Install the meteo app on your smartphone and test the result.
$ cordova run android1
# API proxy
TIP
- You can only perform this part of the exercise if you have PHP web hosting.
- Minimum requirements for your hosting: PHP 7.x and cURL extension enabled.
(sinners.be meets all requirements). - This is NOT a PHP course, hence we do not discuss the code in detail.
- As the application is currently constructed, the OpenWeatherMap API key is in the project's source code.
- Anyone with some experience in Android can unzip the apk file and find your personal API key in the code to possibly use (read abuse) it for his own project.
- You can easily solve this by moving the API key to server-side code such as PHP, Node, ASP.NET, ...
The server-side code acts as a proxy that forwards the data from OpenWeatherMap to the Cordova app.
# weatherProxy.php
- Create outside the www folder a new file, for example: weatherProxy.php.
- Paste the code below into the PHP file.
- On line 6, replace MySecretKey with the API key associated with your account.
<?php

$lat = $_GET['lat'] ?? '51.160946';      // default coordinates: TM Campus Geel
$lon = $_GET['lon'] ?? '4.959205';

$openweatherKey = 'MySecretKey';       // Replace with your API key

$params = [
    'lat' => $lat,
    'lon' => $lon,
    'lang' => 'nl',     // or 'en'
    'units' => 'metric',
    'exclude' => 'minutely,hourly',
    'appid' => $openweatherKey
];

$openweatherUrl = 'https://api.openweathermap.org/data/2.5/onecall?' . http_build_query($params);

$curlOptions = [
    CURLOPT_RETURNTRANSFER => true,
    CURLOPT_USERAGENT => 'Mozilla/5.0',
    CURLOPT_URL => $openweatherUrl
];

$curl = curl_init();
curl_setopt_array($curl, $curlOptions);
$weather = curl_exec($curl);
curl_close($curl);

header('Access-Control-Allow-Origin: *');
header('Content-Type: application/json; charset=utf-8');
echo $weather;
2
3
4
5
6
7
8
9
10
11
12
13
14
15
16
17
18
19
20
21
22
23
24
25
26
27
28
29
30
31
32
- Upload the file to your web hosting (for example: https://yourName.sinners.be/weatherProxy.php).
- Test the script:
- https://yourName.sinners.be/weatherProxy.php (without parameters)
Returns the weather forecast for Geel. - https://yourName.sinners.be/weatherProxy.php?lat=41.902782&lon=12.496366.
gives the weather forecast for Rome.
- https://yourName.sinners.be/weatherProxy.php (without parameters)
# js/weather.js
let Weather = function () {
    // remove this line: const openweatherKey = 'MySecretKey';
    const openweatherUrl = 'https://yourName.sinners.be/weatherProxy.php';
    const openstreetUrl = 'http://nominatim.openstreetmap.org/reverse';

    ...

    const _getWeather = function (lat, lon) {
        // Create a object literal with all the query parameters
        const pars = {
            lat: myLocation.lat,
            lon: myLocation.lon,
            /*lang: 'nl',  // or en
            units: 'metric',
            exclude: 'minutely,hourly',
            appid: openweatherKey*/
        }

         ...
    };

    ...

    return {
        init: init
    };
}();
2
3
4
5
6
7
8
9
10
11
12
13
14
15
16
17
18
19
20
21
22
23
24
25
26
27
- Delete line 2. The openweatherKey is now safely hidden inside the PHP script.
- Change the openweatherUrl on line 3 to the URL of the PHP script.
- Remove, from line 13 to line 16, the parameters
lang,units,excludeandappid(or put the lines in comments).
You don't need them anymore because these parameters are already in the PHP script.
# Install the updated meteo app
- Install the updated meteo app on your smartphone and test the result.
$ cordova run android1